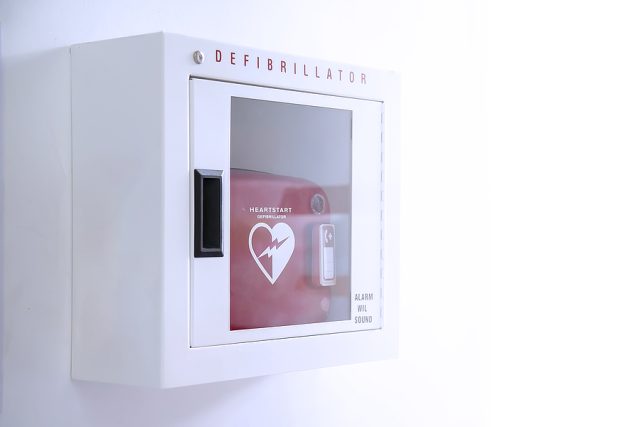
So, you have invested in an Automated External Defibrillator (AED) for your school or business. Now what?
Your AED equipment is just like any other electronic, digital, or mechanical equipment on location. It needs occasional inspections and diagnostics to make sure it is functioning properly. And, occasionally, replacement parts are in order.
Besides recommending (or requiring) employees and staff to obtain their CPR + AED training and certification, which is available online, you must maintain the AED regularly. We’ve created an AED maintenance checklist to help keep you on track, and it begins with understanding the unit’s various parts and mechanics.
Learn the Parts of Your AED
 In the words of the FDA, an AED is a “computerized defibrillator that automatically analyzes the heart rhythm in people who are experiencing cardiac arrest.” When appropriate, the AED will deliver an electric shock called to restore normal heart rhythm. This process is called defibrillation.
While AED’s may vary slightly from brand to brand and model to model, the basic function is the same. All are designed to be used by people who’ve never used an AED before, but the more you know, the better if you ever need to use one. The general parts include:
- The main unit. This will look like a box, and it is where the digital readings and instructions/images are found to provide step-by-step instructions.
- On/off button. Located on the main unit.
- Speaker for the voice prompt. Yes, a computer voice will help to lead the way.
- Visual/pictorial/written instructions. If you are too flustered to read or absorb the visual information, a bystander can help give instructions via any of the multiple ways instructions are provided.
- ECG. The AED has an electrocardiogram (ECG) signal to show you when the heartbeat is back online. A flat line indicates no heartbeat, while the up-and-down spikes/valleys and beeps let you know when the heart starts beating again.
- Adhesive electrode pads. The electrode adhesive pads are placed in specific locations on the victim’s torso.
- Cords. Electrical cords connect the adhesive electrode pads to the main unit, sending the electrical current to the pads.
- Internal analyzer. The internal analyzer isn’t visible as it is housed in the main unit. Once the adhesive electrode pads are in place, the AED’s internal analyzer monitors heart activity and prompts you accordingly.
- Shock button. If there is no heart rhythm, the unit will instruct you to remain clear of the victim and deliver an electric current using the shock button.
Any breakdown or malfunction of these parts and accessories negatively impacts the unit’s function, which is why regular testing, maintenance, and parts replacement are essential.
AED Maintenance Checklist
While the AED is designed to be a completely DIY tool, including testing, maintenance, and parts replacement, many schools, businesses, and organizations opt to adopt an AED Maintenance Plan. Some even hire a third-party AED maintenance contractor, so they don’t have to track it or risk “forgetting” and having an inoperable AED in the event of an emergency.
If you or your organization are going to be conducting routine maintenance, the following is a general AED maintenance checklist.
Store the AED in an obvious and unobstructed location
This rule is in place to make sure people can easily access the AED if someone needs it. It also helps to keep routine AED maintenance at the forefront.
Designate an AED inspection coordinator
There should be a designated individual who either provides the inspections or serves as the contact person with the designated maintenance plan contractor.
Create an ongoing maintenance plan
Your AED manufacturer supplies guidelines for how often a visual inspection of the AED should be done. In most cases, this is weekly or monthly. The inspection coordinator or designated individual should develop a written checklist to assess the readiness of the AEDs and supplies.
Use a maintenance checklist
Your AED provider or manufacturer will provide, or can provide, a maintenance checklist, including a chart to complete following each unit inspection. The list is uniquely tailored to your unit model. However, it also serves as a general guide and provides written proof the unit is on track.
Verify battery installation is correct and check replacement dates
Make sure the battery is correctly installed. AED battery life varies from unit to unit, but most have a lifespan of two to five years, at which point they need to be replaced.
Check lights and alarms
Turn the unit on to ensure the lights work and that the video/audio service and alarm work.
Visually inspect the main unit, sockets, and wires
Look for any cracks, signs of wear or damage, cracked cord insulation, loose connections.
Ensure adhesive electrode pads and backups are current
All AEDs should have at least three sets of adhesive electrode pads. The first is attached and ready to go, and the other two are backups. Pads are single-use, so they must be discarded and replaced after use. Any pads nearing their expiration date should also be replaced.
AED Maintenance Checklist With the Response Institute
Would you like to hand the responsibility of AED maintenance and parts replacement over to the pros? The Response Institute offers multiple plans at very low monthly fees. We’ll make sure your AED is armed and ready to save a life in case of an emergency.
See Our AED Monitoring
